Managing the visibility of the Vercel Toolbar
Learn how to enable or disable the Vercel Toolbar for your team, project, and session.Vercel Toolbar is available on all plans
When the toolbar is enabled, you'll be able to view it on any preview or enabled environment. By default, the toolbar will appear as a circle with a menu icon. Clicking activates it, at which point you will see any comments on the page and notifications for issues detected by tools running in the background. When the toolbar has not been activated it will show a small Vercel icon over the menu icon.
Once a tool is used, the toolbar will show a second icon next to the menu, so you can access your most recently used tool.
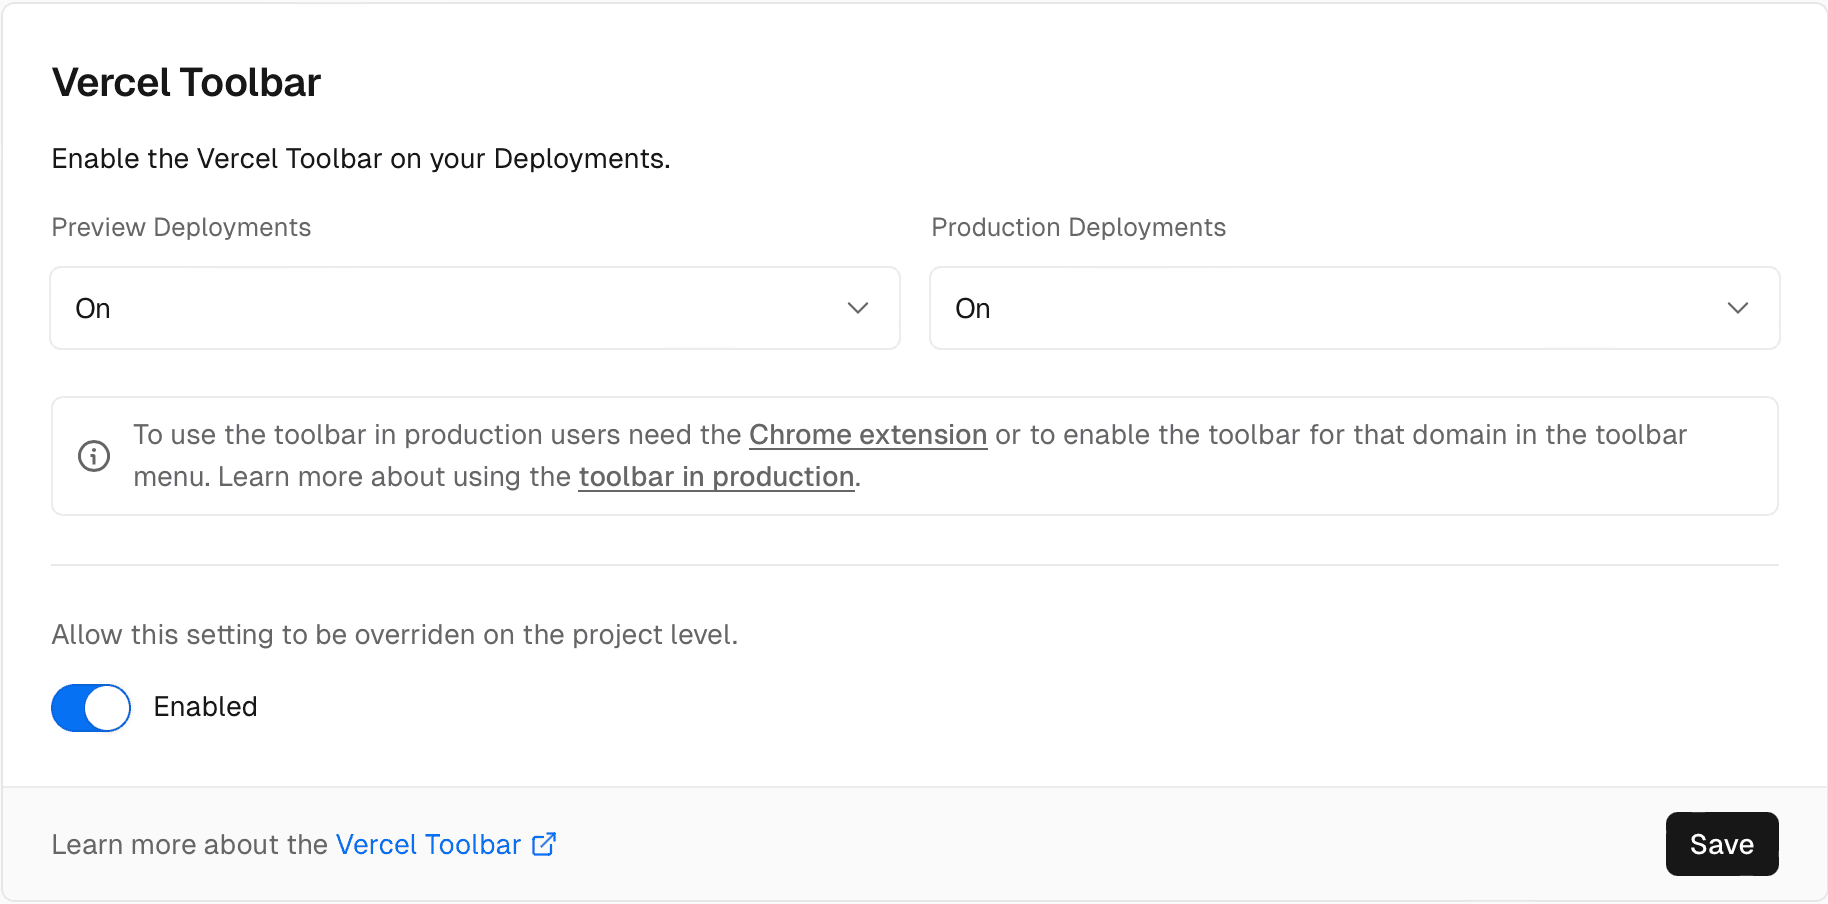
To disable the toolbar by default for all projects in your team:
- Navigate to your Vercel dashboard and make sure that you have selected your team from the scope selector.
- From your dashboard, select the Settings tab.
- In the General section, find Vercel Toolbar.
- Under each environment (Preview and Production), select either On or Off from the dropdown to determine the visibility of the Vercel Toolbar for that environment.
- You can optionally choose to allow the setting to be overridden at the project level.
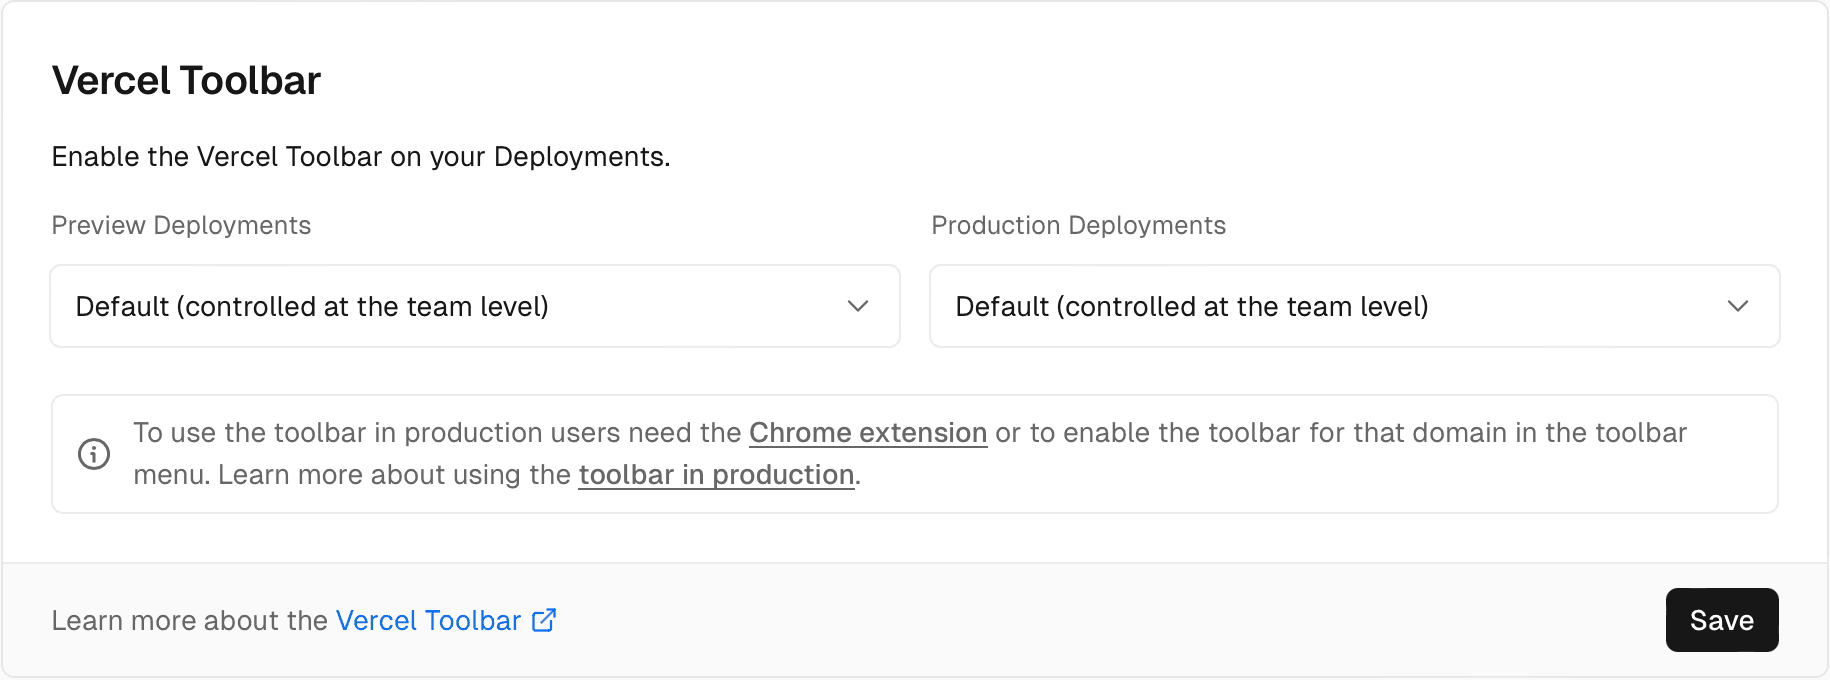
To disable the toolbar project-wide:
- From your dashboard, select the project you want to enable or disable Vercel Toolbar for.
- Navigate to Settings tab.
- In the General section, find Vercel Toolbar.
- Under each environment (Preview and Production), select either an option from the dropdown to determine the visibility of Vercel Toolbar for that environment. The options are:
- Default: Respect team-level visibility settings.
- On: Enable the toolbar for the environment.
- Off: Disable the toolbar for the environment.

To disable the toolbar in the current browser tab:
- Activate the Vercel Toolbar by clicking on it
- In the toolbar menu, scroll down the list and select Disable for Session.
To show the toolbar again, open a new browser session.
Alternatively, you can also hide the toolbar in any of the following ways:
- Select the toolbar icon and drag it to the X that appears at the bottom of the screen.
- Click the browser extension icon if you have it pinned to your browser bar.
- Use ..
To show the toolbar when it is hidden you can use that same key command or click the browser extension.
Users with the browser extension can set the toolbar to start hidden by toggling on Start Hidden in Preferences from the Toolbar menu.
You can use the x-vercel-skip-toolbar header to prevent interference with automated end-to-end tests:
- Add the
x-vercel-skip-toolbarheader to the request sent to the preview deployment URL - Optionally, you can assign the value
1to the header. However, presence of the header itself triggers Vercel to disable the toolbar
You can use Vercel's preview environment variables to manage the toolbar for specific branches or environments
To enable the toolbar for an individual branch, add the following to the environment variables for the desired preview branch:
VERCEL_PREVIEW_FEEDBACK_ENABLED=1To disable the toolbar for an individual branch, set the above environment variable's value to 0:
VERCEL_PREVIEW_FEEDBACK_ENABLED=0To use the toolbar with preview deployments that have custom alias domains, you must opt into the toolbar explicitly in your project settings on the dashboard.
If you have a Content Security Policy (CSP) configured, you may need to adjust the CSP to enable access to the Vercel Toolbar or Comments.
You can make the following adjustments to the Content-Security-Policy response header:
- Add the following to
script-src(Most commonly used):script-src https://vercel.live - Add the following to
connect-src:connect-src https://vercel.live wss://ws-us3.pusher.com - Add the following to
img-src:img-src https://vercel.live https://vercel.com data: blob: - Add the following to
frame-src:frame-src https://vercel.live - Add the following to
style-src:style-src https://vercel.live 'unsafe-inline' - Add the following to
font-src:font-src https://vercel.live https://assets.vercel.com
Was this helpful?